I downloaded the bird template from the Martha site. I had some fabric backgrounds that I scanned into my computer. I chose a background and then first placed the bird in the center and filled it with a solid color. I gave it a name and saved it using Save As... and then without closing the file, I selected the bird and then went to Select > Inverse and filled the outer part with the color that was on the bird in the just saved file. Now the whole canvas was covered with that color. But, with the selection still in place, I again chose Inverse and then just the bird was selected. I deleted the color on the bird to let the pattern on the scanned fabric show through. I then saved that with a different name. I use Photoshop CS3 for all my digital work.
And speaking of PS CS3, I was booted from HughesNet again yesterday for using too much bandwidth within a 24-hour period, so I had all day to play with Photoshop (well, not all day - the whole family was out for dinner last evening and we had a blast!).
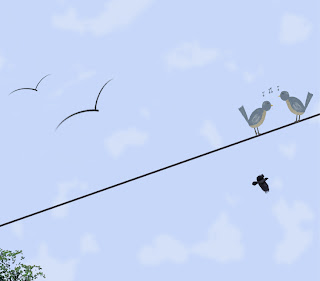
 I began with a bluebird using the idea that all things are made up of everyday shapes. I used the elliptical marquee tool to make a circle for the head, an ellipse for the body and then used the polygonal lasso tool to make a rhomboidal shape for the tail.
I rotated the ellipse for the body into place and used the Liquify filter to make the "feathers" at the far end of the tail.
I then added color and used the dodge tool for highlights and the burn tool for shadows as well as separate layers with bits of white on them with reduced opacity for some of the highlights and for the light in the eyes.
When I was relatively happy with him, I made a duplicate of him and used Edit > Transform > Rotate horizontally to make him a friend. I put them both on a wire and used music symbols to signify their conversation.
I used a brush to make the birds flying off to the left and used a vector drawing of the crow that I had on my computer for the crow.
I used the Filter > Render > Clouds to make the sky and then played with the colors and blending modes until I thought it was somewhat believable.
I added a little bit of treetop to the bottom left and Voila!
I have a yearly physical this morning so am planning to begin my day without coffee or breakfast so that when I get the order for blood work, I can have it done while I am in town. Once I get home and eat and have coffee I will make my trip to the post office to send out my Pay It Forward goodies that are already in addressed bubble envelopes.
I am planning to get started on the puzzle pieces after that and will share my progress tomorrow. I am hoping to get word today that I can share my secret project with you and if that is the case I will also share that either later today or tomorrow.
I guess I'd better go get in the shower and begin my day.
Bye!


Interesting and creative with great instructions! I like it very much. Hope your physical goes well for you. hugs, nancy
ReplyDeleteThese are just too cute. They'll make a gorgeous card. So sweet.
ReplyDeleteSox
Vicki: Thank you for visiting my blog. Just took a little stroll through yours and your artwork is lovely. You are very good at photoshop.
ReplyDeleteRegarding your question, I sell my photography and artwork, so no it cannot be used by others - so please do not use that or any photographs of mine for your photoshop work. Regrets, but as an artist I'm sure you understand.
JHawk,
ReplyDeleteYou never cease to amaze me. I can't wait until I get a handle on PSE7 so I can get creative. Thanks for the directions. They are easy to follow.
The birds are so cute ... and thank you for sharing!
ReplyDeleteI just love seeing all the amazing things you do with photoshop, Vicki! I'm so impressed!
ReplyDelete