I used a Wacom tablet but you could just as easily write your signature (a bit large) with black on a white piece of paper and scan it into Photoshop.
File > New
I chose a 6 x 6 file with the pixels per inch set to 300. If you don't get a white background by default (I have my selection in the file > new dialog box set to a white background) you can fill your background layer with white. Then click on the new layer button in the bottom of your layers palette (it is the second from the right next to the trash can). In the screenshot below you can see my history palette. The reason there are so many listings of the brush tool is that when I write I lift my pen several times.
Edit > Define Brush Preset
This brings up a dialog box where you can name your brush.
Then close this document. When asked if you want to save it, choose Don't Save (you've already saved it as a brush).
Now let's open a picture that we want to put our signature on:
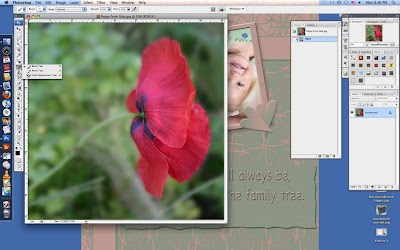
I've chosen my current favorite flower picture.
Select the brush tool.

Then go to the drop down menu in the options bar and find your signature brush (it should be the last one in the list or the last icon. If you hover your mouse over each brush the name of that brush will be shown.
WHOA! My brush is way bigger than my picture!!!!!
To change the size of any brush use the bracket keys on your keyboard. The left bracket makes the brush smaller and the right bracket makes it larger. I am using the left bracket to get the size I want.
Look in the bottom of the tool palette to see your foreground and background color chips. Mine are black and white. Your brush will use the foreground color. I don't want mine to be black, I want it to be white, so I will click on the double headed arrow just above and to the right of the color chips to get white as the foreground color and black as the background.
If you want a color that isn't either black or white, just click on the foreground color chip (the top most one) in the tool palette. This brings up the color box for you to choose a new foreground color. The nice thing about this is you can click in your picture if you want a coordinating color.
Move your signature brush to the place on your picture and click just once to get your signature on the picture. If you are unhappy with the position or color, there are a number of ways to go back one step. You can use Command-Z, which is the Undo command, you can go in the history palette and click on the previous history state, or you can go to Edit > Undo.
Here is what my picture looks like with my signature:
Now, let's save that brush so that even if you choose a different set of brushes in your brushes palette, you can always find your signature brush.
Edit > Preset Manager
Choose your brush (see the dark border around mine in the screenshot below?). Then select Save Set.
Here is the path I choose when I save my custom brushes:
I hope you liked this tutorial and find it easy to follow. Please let me know if there is anything confusing or if you need more information.
By the way, I am working on a secret project which I will share with you in early October. Stay tuned!
Meanwhile, I need a second mug of coffee before my daughter drops off the 2 year old, who is spending the day with us.
Bye!


I *love* your tutorials, Vicki!!
ReplyDeleteOh, I do like this one! Very clear, and so time-saving compared to creating a text box every time. I am now a Follower, and will be reading every one of your photoshop tutorials very very carefully! And implementing them!
ReplyDeleteKeep up the good work.
Good Work Man ! Keep it up !
ReplyDelete